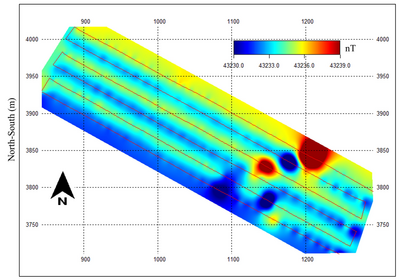
MagArrow eliminates the dead-zone effect by having two orthogonally orientated sensors operating simultaneously, at the cost of heading effect. Depending on the survey site and flight stability, the heading effect may become obvious, as shown in the picture below.

The heading effect can be mitigated through data processing. Geometrics recently published a peer-reviewed paper, explaining in detail the heading-effect compensation method. The paper can be found at https://library.seg.org/doi/abs/10.1190/tle41070481.1. A draft of the paper can be downloaded below.
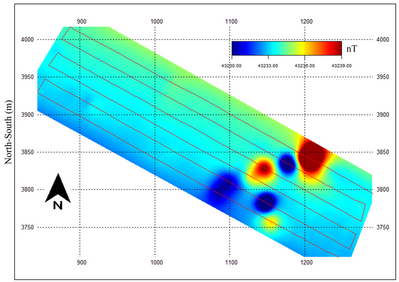
After the compensation, the heading effect is removed and the new survey data is plotted below.

Geometrics also provide a preliminary data processing program for MagArrow and MagEx customers.
Before you run the program, please download and install the LabView Runtime (free, 64-bit 2020 SP1) first:
https://www.ni.com/en-us/support/downloads/software-products/download.labview-runtime.html#369642
The user guide is also located in the folder.
It is worth mentioning that the data processing program provides 2 methods of suppressing the MagArrow noise:
1. Through frequency filtering and line levelling (Survey Data Noise Reduction).
2. Heading effect compensation (Heading Error Compensation).
In general, to perform the heading error compensation, you need to collect heading effect calibration data (Instruction included in the folder).
It is possible that the calibration data can be obtained from the survey data itself.
If you have trouble processing your data, please share some of your data with Geometrics and we can provide help, especially in generating the calibration file.

